Cookin' Up Creations has a new theme for the month of December!!! This month's Blue Plate Specials will focus on the theme of Santa's Toyland!!! Stop by for some amazing inspiration.
Background
Monday, December 3, 2012
Sunday, December 2, 2012
Show and Share - a few new layouts!
I just wanted to share a few new layouts that I have created! All of these were fall themed layout and I thought that I had better share since fall is almost completely gone in Northern Michigan!! I hope that you like them!
Tuesday, November 20, 2012
A Halloweenie Good Time!
I just wanted to share a few Halloween themed layouts that I created lately. The first is one of my son listening to his least favorite song. Around Halloween every year, the radio
station plays the Dogman Song. It is about a dog that walks upright and
terrorizes and kills people in the Upper and Northern Lower Peninsula.
The song has ALWAYS terrified children in our area (to the point that
the kids would sleep with a baseball bat next to their bed around
Halloween time.) When the song comes on, to this day, my son freaks
out. We had to document it! This layout was based on a sketch from NAS!
The second is my daughter dressing up for likely her last Halloween. She found these glasses last year and just knew she wanted to be a Hippie for Halloween!
The second is my daughter dressing up for likely her last Halloween. She found these glasses last year and just knew she wanted to be a Hippie for Halloween!
Sunday, November 18, 2012
DT Openings at CUC
Hello everyone! I know that I have been gone a while - the beginning of the school year this year has been crazy - but I wanted to let you know that I am still scrapping! I am still a member of a couple of amazing design teams and wanted to share with you a link if you would like to become a member too!
My family over at Cookin' Up Creations is amazing, supportive, inspiring, motivating, and frankly, a group of amazing ladies! I love to go there to chat, vent (just a little), and get my mojo going. This months Blue Plate Special Challenges are around the theme Home is Where the Heart is.
I am not at liberty to share quite yet, but I am so looking forward to December's theme and am hoping for a little Blog Hop thrown in!!!
Anywho . . . the next round of DT entries have begun to roll in! If you would love to be a part of this amazing team, check out this link and enter!!!
Saturday, August 11, 2012
Show and Tell Saturday - Sweetly Scrapped
Today I wanted to share with you an amazing site - Sweetly Scrapped - for freebie printables and here are more. They offer many freebies and many others that you can purchase! Exploring this site could take your quite some time but I thought that I might share some of my favorites!
1. Who can resist this camera?
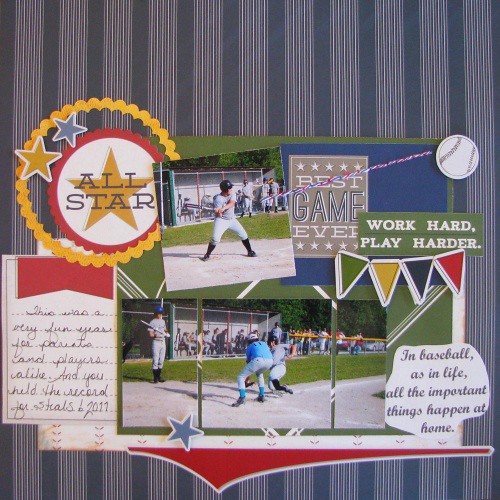
2. I love these banners and tickets!
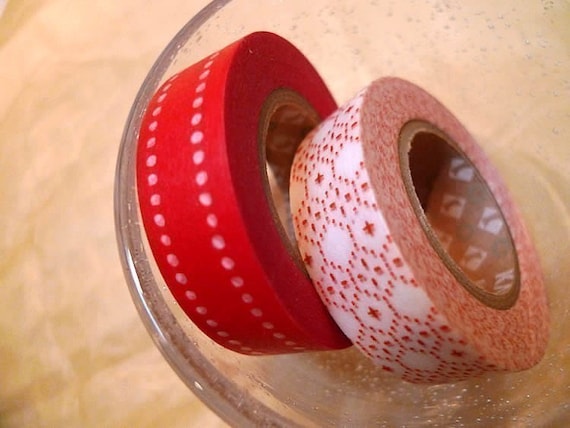
3. Check out these cute washi tape strips!
4. I actually won these in a giveaway at Sweetly Scrapped and they are adorable!!!
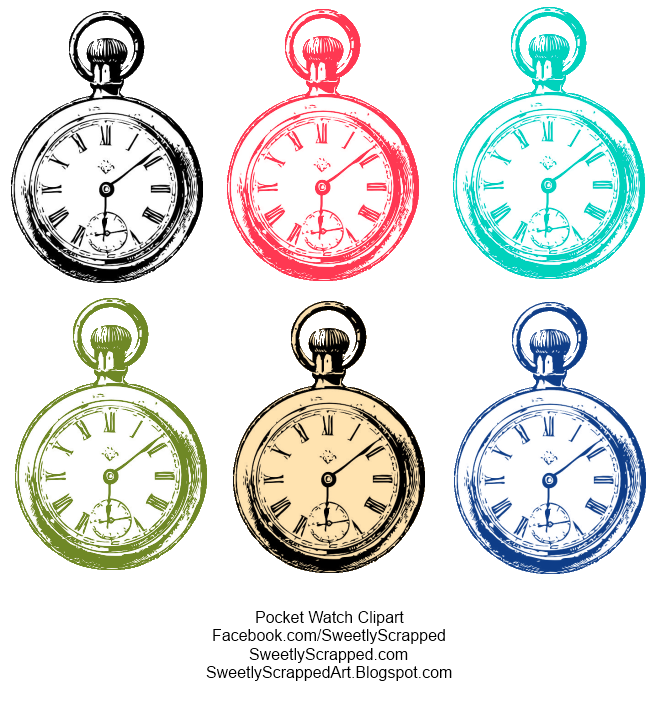
5. And these colorful watches!
6. And the teacher in me couldn't resist these pencil toppers. I hate those "cute little pencils that never sharpen as prizes but these little toppers would be cute on any regular pencil!
If you haven't checked out this site, please do! It is amazing!!!
Sunday, August 5, 2012
Viewmaster Slides Tutorial and Handmade Embellishment Linky Party
I have loved the trend of Viewmaster slides as of late but I haven't been able to find them in my LSS. So then I started thinking . . . Cassy . . . why not make some of your own to coordinate with your layouts. So I started playing with punches and such and here is what I came up with. I made several of different sizes for the following layout for my NAS DT reveal. The layout also made Cookin' Up Creation's layout of the week! YAY!
And here is how I made the slides:
1. First I gathered supplies. I needed a circle (mine was a 3" circle), coordinating scraps, a 1" square punch - or you could hand cut them, a rectangle and oval hand punch, and a 1" circle punch.
2. Next, I place a small mark on the top, bottom, left, and right to line things up. I used my quilting mat that I work on for that but a ruler would work just fine,
3. Then I glued a 1" square next to each mark. You will need 12 squares in total for a 3" circle.
4. I then glued 2 squares in between each of my marked squares and I trimmed an old paper flower and punched a coordinating 1" circle and glued them in the center.
5. And finally, I erased the marks and punched 4 rectangles and just nipped the edges in between each square with the oval punch to create the round marks.
Here is another layout that I created recently with a handmade embellishment. I found the flower tutorial on Pintrest and couldn't resist making a smaller version. I also trimmed the outside edge to make a more delicate flower when I was finished.
So share with us your favorite handmade embellishment. Link back to your blog if possible and we will have a collection of amazing inspiration. Also, I will again send out a small RAK for the random drawing for anyone who enters. Remember you can link up to five projects, cards, or layouts! Last week's winner was Jan!
Thursday, August 2, 2012
CUC's New Theme
I love the sights and sounds of an amusement park. The cotton candy, popcorn, caramel apples (my personal fav), waffle cones, bright colors, bright lights at night, and so much more!
The month's theme at Cookin' Up Creations is. . . . wait for it . . . . Amusement Parks! Come join us for some amazing challenges and great prizes and frankly, just a fun and supporting place to share! You won't be disappointed and may even find a new home to visit daily.
Monday, July 30, 2012
Summer Layout, Card, Altered Project Linky Party
One of the things that I would love to do each Sunday is to create a place that people can go to share their favorite layouts, card, projects that they make. I have found very few of these online and I thought that it might be fun to try one out and see how it goes. So for at least the next month, I would love to have a Linky Party every Sunday (Sorry I had planned this for yesterday but we just switched internet services and I was without for a day). It is very simple. Just share the favorite scrappy item that you created in the linky party. Each entry (up to 5 per person) will enter them in a drawing for a cute little RAK. I can't wait to see what everyone creates! Bare with me - this is my first. I hope all goes well!
Here is my favorite Summer related layout that I have created.
Add your project in the linky list below:
Here is my favorite Summer related layout that I have created.
Add your project in the linky list below:
Saturday, July 28, 2012
Show and Tell Saturday - Creative Cards
Now I am not much of a card maker myself, but lately, I have been quite inspired by some cards that I have found here and there recently. These cards are very unique, pretty, and frankly clever gifts! Check these out!
1. Look at this colorful card from Leigh O'Brien at Sunflower Studio
2. Again, I love the shape of this card and the color palette from the Diva Stamper. It is very unique and pretty!
3. I think that ANY kid (including myself) would love to get this coloring card. I don't know who to give credit to for this card. Isn't it cute though??
4. What about this cute little mustache card? Who can resist this one by Amy Sheffer at Pickled Paper Designs? This site is one of my favs!
5. I love the bling and embossing on this card from Kim at Joyful Creations:
Thanks for joining me for another version of Show and Tell Saturday! Come back tomorrow for a little inspiration and Linky Party!!!
Thursday, July 26, 2012
Purple Pumpkin Surprises Giveaway
Hello again all! Just wanted to share Purple Pumpkin's newest giveaway today. If you like surprises then this is just for you! They are giving away their Lucky Dip Bags full of buttons and embellishments. They also have amazing inspirational layouts! Go to their site and sign up! It is that easy!
Wednesday, July 25, 2012
Christmas in July Blog Hop Winner!
ScrappyJo is the blog hop winner of the set of Pretty Tape from one of my favorite Etsy stores! Thanks for all the amazing comments!
Sunday, July 22, 2012
Christmas in July - Make your own bows!
I have an awesome little tutorial to share with you today that I also posted as one of the challenges on Cookin Up Creations Christmas in July Crop. You can get a head
start on your gift wrapping! This would work for any holiday and it
only requires a 6 x 12 (or I also did a 6 x 8 bow with one less layer)
piece of scrap paper, gift wrap, or I have even seen some people using
magazines and some hot glue! I tried the tutorial with sticky dots but
if you use a heavier scrap, they seem to pop apart.
Then I couldn't stop making more! I even played and made one with less layers and punched the edges of the pieces to make a lacier bow!
The first bow took me about 15 minutes to make. After that, I was whipping them out and couldn't stop! My daughter and niece were amazed. How cool to use your scraps and make something special to decorate a gift. Bows like these cost over a dollar each at the store unless you buy the bags around Christmas time. I find that they often don't match the package and smush easily. These are very strong and solid and look amazing! Your family will be totally impressed. I plan to make a lot more of these for wrapping all types of gifts for any holiday!
The tutorial from Split Coast Stampers is very thorough - http://www.splitcoaststampers.com/resources/tutorials/dsp_bow. The only tricky part that I found is that when you are cutting, you cut the 6" strips, turn the paper and cut the 4" strip, then turn the paper back to cut the 5" strip. That way you only need one 6 x 12 piece. By using hot glue, I didn't need to use brads but either way would work! Now go and build a stash for the future!
Wednesday, July 18, 2012
Christmas in July Blog Hop
Welcome to the CHRISTMAS IN JULY blog hop, hosted by the Cookin' Up
Creations Master Chef Challenge Team! The temperatures outside may say
summer, but it's cool in here!! We hope our projects and craft ideas
will help you get a head start on your holiday crafting. If you have
been following the hop route, then you should have come from (person
before you)'s blog. If not, and you would like to follow along the
complete blog hop itinerary, please start at the Cookin' Up Creations
Blog so you won't miss any of the fantastic projects and inspiration the
"chefs" have cooked up for you. And be sure to join us for the Christmas in July Crop this weekend for some awesome challenges and Christmassy (Is that a word??) inspiration!
Welcome everyone! If you are following our little Blog Hop schedule, you should have come from Barb's Blog and then should continue onto Jan's Blog. Just click their names! Today, I have an amazingly cute little project to share with you that allows you to add some scrappy decor to your living area and use up those scraps!
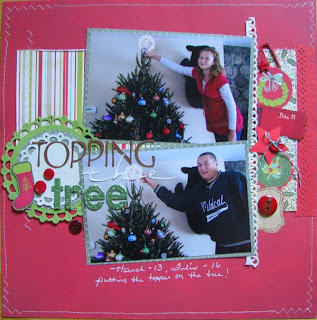
Now, I started today's project by creating a Christmas layout. I love this Echo Park Line (as I do most of their lines) and I scrapped last year's Christmas pictures of the kids putting the star on the tree. Now we do this every year. Both kids take turns putting on the topper and we take their pictures. We no longer have to lift them up though. They can do it all on their own. So I started with an older Page Maps sketch and added some papers and embellishments from the Echo Park papers. I did a little stitching and voila!
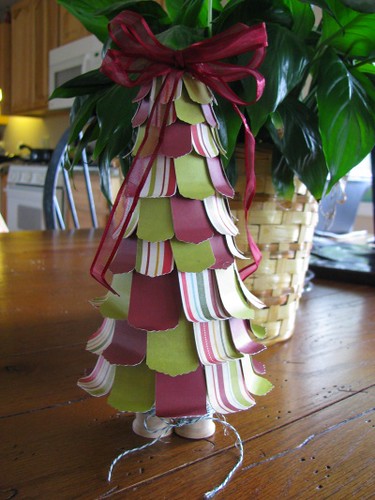
Now of course, as with most layouts, I had some scraps left over and if you know me at all, you know that I love to use my scraps. So I decided to create a quick little paper tree!
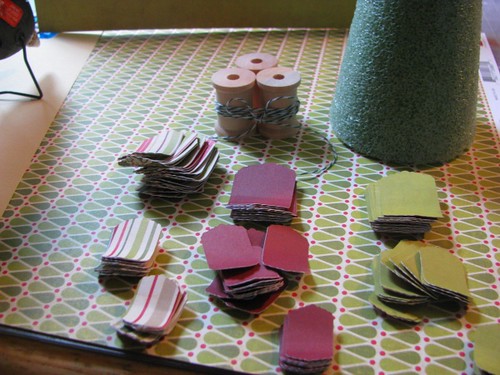
It was so easy to do! First, to create this project, I needed 3 small spools, a small foam or paper mache cone, hot glue, twine, ribbon, and of course, scraps. I also used my Cricut machine to cut the tags. I used the "Preserves" star fruit tag. I cut 11 - 2 inch tags of each color, 14 - 1 1/2 inch tags of each color, and 16 - 1 1/4 inch tags of each color.
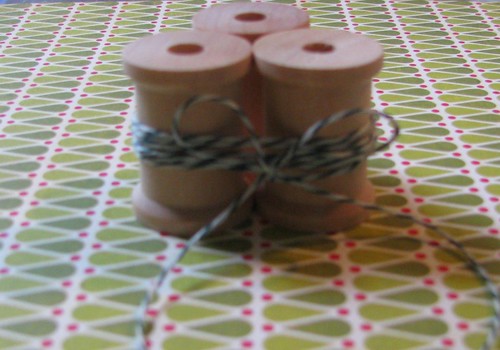
First, I tied three spools together with some twine:
Then I hot glued the base of the cone to the spools. Next I curled one end of each tag around a pencil. I did several at a time.
I started with the 2 inch and went about a third of the way up the spool hot gluing and slightly overlapping each tag. Then I started with the 1 1/2 inch tags and did the same. I finished with the small 1 1/4 inch tags.
Finally, I added a bow to the top! These would be so cute on a mantel or in a window for Christmas decorations!
Now I would love to give you a chance to win a Christmas Prize! If you aren't a follower here, then pretty please, become one. Leave a comment and for every person that leaves a comment (even if you are already a follower), I will put your name in a drawing for a set of pretty Christmas Washi Tape. I will announce the winner at the end of the Blog Hop.
Thanks for joining us and don't forget to continue on to the next blog - Life in the Slow Lane to check out Jan's inspiration!
Tuesday, July 17, 2012
Christmas in July Blog Hop and Crop
Tomorrow we at Cookin' Up Creations will begin a Christmas in July Blog Hop to help you get motivated and start thinking about your Christmas cards and projects this holiday season. We will begin with the blog hop starting at CUC Blog and share some amazing projects and inspiration, and even some possible prizes (hint hint) tomorrow. Then we will have a Christmas in July Crop this weekend where we will post some challenges, games, and again provide some projects and inspiration during this HOT, HOT, HOT, did I say HOT month. Again there will be some prizes to win! So stop by tomorrow in your Blog Hop journey, drop a comment or two, and get yourself ready for the crop this weekend. Share with your friends too! We shall have a ball! A snowball that is!
Thursday, July 5, 2012
Summer Sketches Part Two
One of the things that I shared with you this year was a group of amazing summer sketches for a Show and Tell Saturday. I said that I would like to try each of them this summer and share the results with you. I managed to get three done this week and thought that I would post so you could check them out!
The first sketch:
And my take (which I couldn't resist adding the pinata banner to!):
The second sketch:
And my take - I made my own stencil for this and I will show you how later this week!:
And the third and last sketch for today from Nuts About Sketches:
And my last layout to share today (I added an extra photo here - couldn't resist):
I hope you like the first reveal of my Summer Sketch collection!
Saturday, June 30, 2012
Announcement!!!
I am thrilled to announce that I will once again be joining the Cookin' Up Creations Challenge Team for the July-December term.
Last year, the Good Lord intervened, and made it apparent that I should take some time off from creating. It revolved around a pay cut for teacher's at work and how that was going to cut into my hobby funds. Little did I know that within 2 short months, my mother would be diagnosed with two inoperable brain tumors and would pass. My world was turned upside down and every moment of spare time would be spent with her, family, and friends. Little else mattered in my world. It took me a while to begin to recover and with a few set backs, I am back creating and scrapbooking.
I am not one to scrapbook or even take pictures of myself but my first job for CUC was to create a layout about love. I know that I want my children to remember some of the positive things about me when they are older and I am gone and I want to make sure that there are decent photos to remember (My daughter is a One Direction fan and of course couldn't resist this pose) so here is a layout about things I love:
Now I am pleased to be with this amazing and inspiring group of ladies once again. Please join us for the month of July for a Nursery Rhyme themed array of Blue Plate Specials! August also proves to be a barrel of fun!!!
Buttons, Buttons, Who's Got the Buttons - Show and Tell Saturday
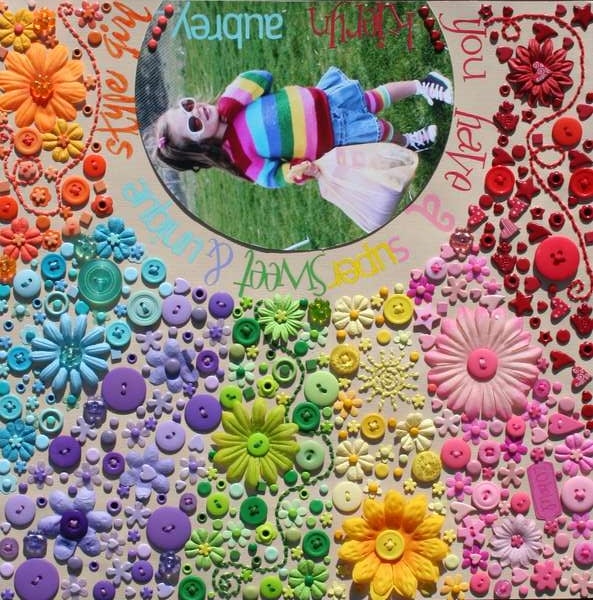
I couldn't resist sharing with you some amazing button projects that I have found on the web lately. I absolutely love using buttons as embellishments on my scrapbooking layouts. In fact, as usual, I have a tad bit of a hoarding problem when it comes to buttons. Shhhhh . . . don't tell - otherwise my daddy will quit buying me more. He finds tons of buttons at garage sales - gotta love him! Check out these ideas for all of you who may have a teeny tiny hoarding problem too!
1. Button Art - I love this button tree by Monica Furlow. So inspiring!
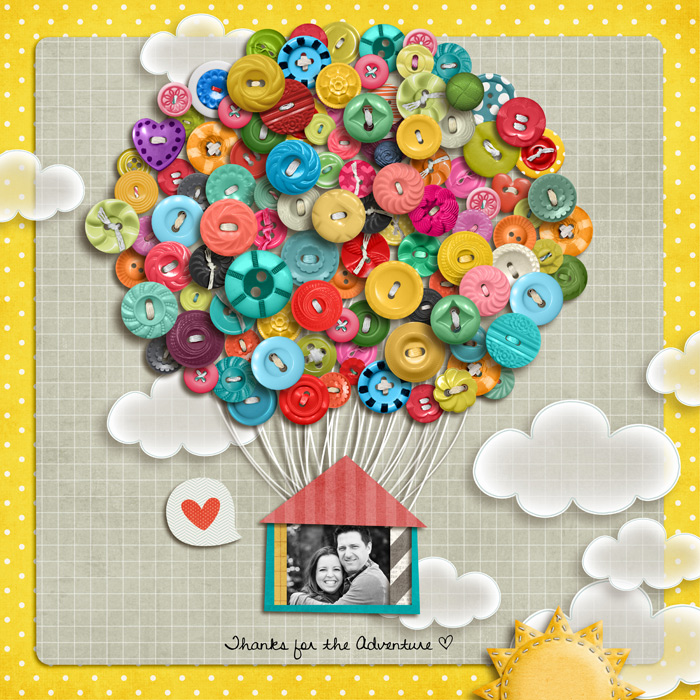
2. Look at this cute little Hot Air Balloon canvas from SugarBabe at SweetShoppeDesigns.com
3. Don't have a button in the color you would like??? Dye a white one to make the right color!!! This is a great tutorial!
4. I love the rainbow look for this card using banners and buttons from WPlus9 Design Studio!
5. And finally - you must check out the button art ideas at Tay's Rocha's blog - INSPIRING!!!!
So on your Fourth of July holiday - run your fingers through your button box and Play! Man I miss teaching kindergarten!
Subscribe to:
Comments (Atom)


