

Saturday, June 8, 2013
Show and Tell Saturday - CUC Turns Four
Hello everyone! I wanted to share with you an AWESOME SITE! I know that I have posted about this site before but this month is particularly special. Cookin' Up Creations is turning FOUR!!!
All month long we are planning and sharing amazing challenges, games, inspiration, way cool prizes, and much more - friendship! I have been a member of this site for a few years now and love the relationships formed here. Come join us for sketch challenges, birthday celebration challenges, unique gift ideas, birthday games like Pin the Tail on the Donkey, and more. We would love to have you! Don't forget to browse the gallery!


Sunday, May 26, 2013
Show and Tell Saturday (kinda) - My favorite Cut Files
Okay, so I know that it is Sunday - sorry graduation parties are keeping me busy - but I wanted to share a few of my favorite Silohuette Files. I received a Silohuette for Christmas and have been hoarding files ever since. I'm kind of a hoarder - Ahem . . . here they are!
1. I love this cut file from Ashley at the Paper Bakery. This file would be awesome between picts of my two kids!!!
 2. I love these gears for boy themed layouts from KLDezign:
 3. Perfect for Project Life or any layout - Also from KLDezign:
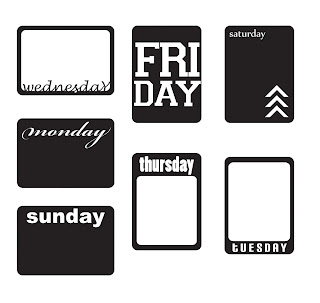 4. I love this star and circle border from Chic Tags:
 5. Also from Chic Tags:

6. And even though you have to pay for these from Two Peas:


 Just thought that I'd share! ;) Enjoy!
1. I love this cut file from Ashley at the Paper Bakery. This file would be awesome between picts of my two kids!!!


6. And even though you have to pay for these from Two Peas:
Saturday, May 11, 2013
Summer Scrappy Goals - Show and Tell Saturday
One of the things that I love about teaching is the summer. No, I don't get the summer off with classes, planning, redoing curriculum, learning new techniques, etc, but I do get some time to work on projects that I can't get done in the regular school year. Most of the time my evenings are spent cooking, cleaning, grading papers, making seating arrangements, or falling asleep on the couch! So I thought that I would share a few scrappy/altered ideas that I want to do this summer!
1. I love anything that displays photos so when I saw this wreath from Try It Do It, I knew I must try it. I have tons of old photos that have been passed along to me and my plan is to make copies and display. My family would love to see my Great Grandmother, her great grandparents, etc!
 2. I want to make this perpetual journal from Meredith Winston for next year - and maybe even do one to finish this year. I then can record awesome memories all year long - and as my kids have my sense of humor, it is always interesting to hear the stuff that comes out of their mouth!
 3. I must decorate my hallway going up the stairs like they did here. I painted last year and hope to decorate this year. I love the extra embellishments here and would love to add some vinyl quotes as well!
 4. And who could resist this display by weddingbycolor.com? These would be so cute on the mantel up the stairs!
 5. And finally, I am absolutely in LOVE <3 a="" album="" camera="" from="" href="http://bobunny.blogspot.com" mini="" shaped="" target="_blank" this="" with="">Bo Bunny

So those are my summer goals for this year. I would add more but this is also my home improvement time and I have tons to do! Hope you can take some inspiration from this post and use it in your home! I will post my progress as the summer begins - OFFICIALLY JUNE 10th at 2:30 pm but who's counting???? :)
1. I love anything that displays photos so when I saw this wreath from Try It Do It, I knew I must try it. I have tons of old photos that have been passed along to me and my plan is to make copies and display. My family would love to see my Great Grandmother, her great grandparents, etc!
So those are my summer goals for this year. I would add more but this is also my home improvement time and I have tons to do! Hope you can take some inspiration from this post and use it in your home! I will post my progress as the summer begins - OFFICIALLY JUNE 10th at 2:30 pm but who's counting???? :)
Sunday, May 5, 2013
Re-using Sketches????
There are so many amazing sketches out there to inspire and challenge us on a daily basis but I began thinking . . . (yep dangerous) . . . and sometimes I come across a sketch that I want to use more than once. My worry is that my pages may start to look the same so I try to mix it up a bit and use older picts on one and newer on the re-used sketch layout so they won't be so close together in my albums.
That definitely works but this time around I wanted to use the same sketch in the same album (livin' on the edge!) So I thought that I might try to angle the sketch so it won't be so obvious!
I re-used this sketch from Sketches with a Twist - and changed up the angle and embellishments.
 Here is the first layout:
 and the second angled layout!

So that's it! Re-using favorite sketches with a slight twist! Try it out!
That definitely works but this time around I wanted to use the same sketch in the same album (livin' on the edge!) So I thought that I might try to angle the sketch so it won't be so obvious!
I re-used this sketch from Sketches with a Twist - and changed up the angle and embellishments.


So that's it! Re-using favorite sketches with a slight twist! Try it out!
Saturday, April 27, 2013
Sketch Mania! Show 'n Tell Saturday!
Now you all know that I love sketches! Every layout that I create (ok maybe not EVERY layout but most) starts with a sketch of some sort. Here are a few of my favorites lately!
This first sketch comes from Ideas for Scrapbookers and I knew that I wouldn't be able to resist try it out since it was so unique!
 And here is a layout of my son and some friends on Superhero Day. Please excuse the dorky costumes!!!

And this sketch come from Nuts about Sketches. I chose to only do the left side but I loved the way it turned out!


This next sketch also comes from the same site!

 And finally, one last sketch from Sketchabilities.


This first sketch comes from Ideas for Scrapbookers and I knew that I wouldn't be able to resist try it out since it was so unique!
And this sketch come from Nuts about Sketches. I chose to only do the left side but I loved the way it turned out!


This next sketch also comes from the same site!
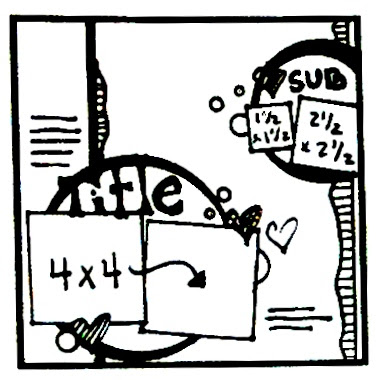

Sunday, April 21, 2013
Washi Tape Buttons
Good Sunday Morning everyone! I just thought that I would pop by and share a quick little tutorial that I did this morning. In my surfing on Pinterest (Yes I know it is addicting) I found this cute little tutorial on Washi tape covered tacks and thought - hmmmmm . . . buttons? brads? So I thought that I would give it a little try. Here is what I came up with:
1. Gather supplies - Unwanted buttons - My father picks up tons of buttons at garage sales for me and so I have a tons of those not-so-appealing white ones, washi tape, a darning needle or piercer, and maybe an exacto knife.
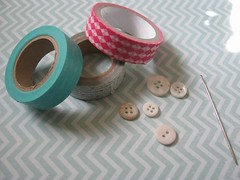 2. Lay your button on the washi tape tape sticky side up and trim around the edge.
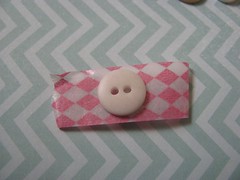
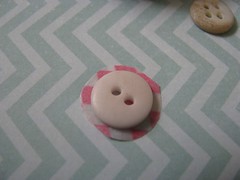 3. Begin folding up the edges and run your nail along the edge to secure.

 4. Finally put the large end of your needle or piercer through the holes and wiggle a bit til you get the desired effect.
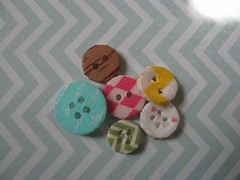 5. Now I like the rough edges at times but sometimes I like a cleaner edge so on the green and teal buttons, I trimmed around the edge with an exacto knife!
Here is a layout that I created using teal buttons with a rough edge. My daughter loved the One Direction store at the MOA!

Extend that washi tape and try these out!
1. Gather supplies - Unwanted buttons - My father picks up tons of buttons at garage sales for me and so I have a tons of those not-so-appealing white ones, washi tape, a darning needle or piercer, and maybe an exacto knife.
Here is a layout that I created using teal buttons with a rough edge. My daughter loved the One Direction store at the MOA!
Extend that washi tape and try these out!
Saturday, April 6, 2013
Show and Tell Saturday - A few cute Washi Tape ideas
I love Washi tape! I love the colors, the sheerness of it, the flexibility, and so much more! So when I saw a few new ideas for Washi tape on Pinterest, I knew that I would have to share them with all of you.
1. First, a tutorial from Paperiliitin. This tutorial shows how to make feathers from Washi tape and a bit of wire! So cute!!! I had to try it out!

And on this layout, I used a few:

2. I love the idea of making my own twist ties for layouts and cards as they did here in this cute tutorial from Organize & Decorate Everything - a bit of wire and Washi Tape - That's it!
 3. How about Washi stickers from Allison???? Just some label backing and washi tape!
 4. I even found a tutorial on how to print on Washi Tape from Hambly Screen Prints:

I hope that you are inspired to play with a bit of Tape this weekend! Enjoy!
1. First, a tutorial from Paperiliitin. This tutorial shows how to make feathers from Washi tape and a bit of wire! So cute!!! I had to try it out!
And on this layout, I used a few:

2. I love the idea of making my own twist ties for layouts and cards as they did here in this cute tutorial from Organize & Decorate Everything - a bit of wire and Washi Tape - That's it!
I hope that you are inspired to play with a bit of Tape this weekend! Enjoy!
Subscribe to:
Posts (Atom)